
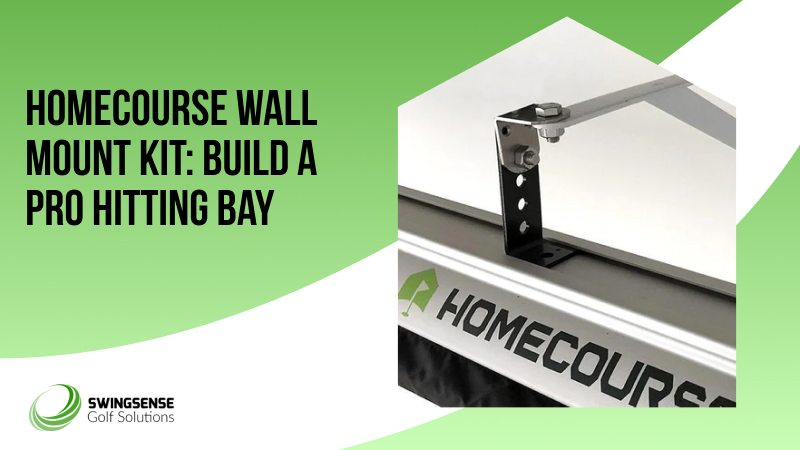
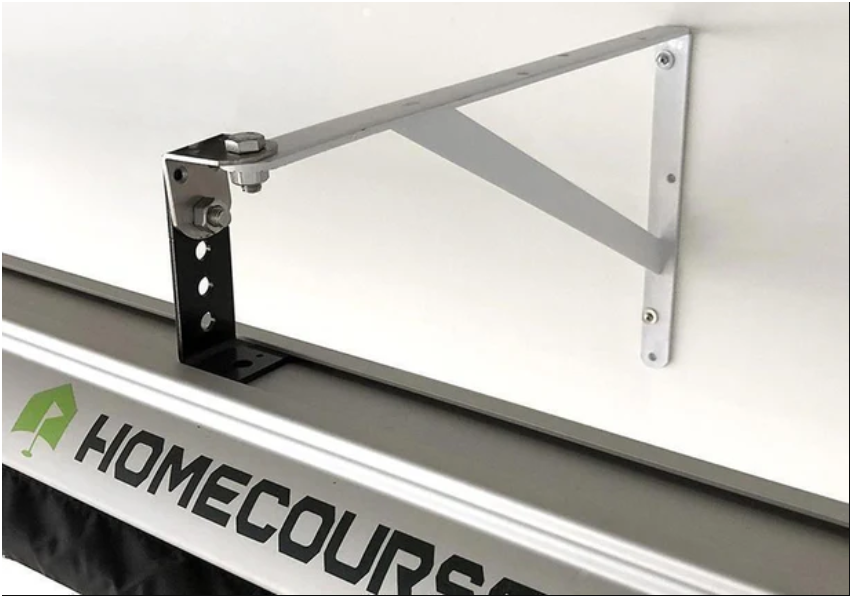
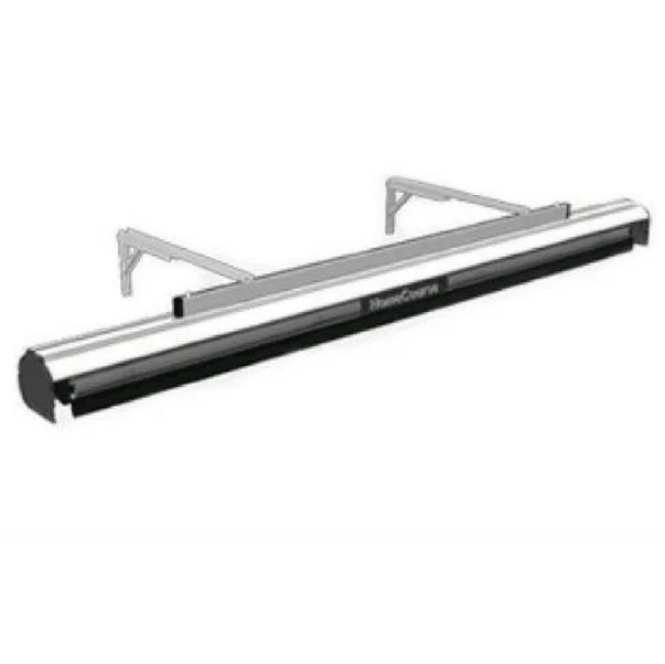
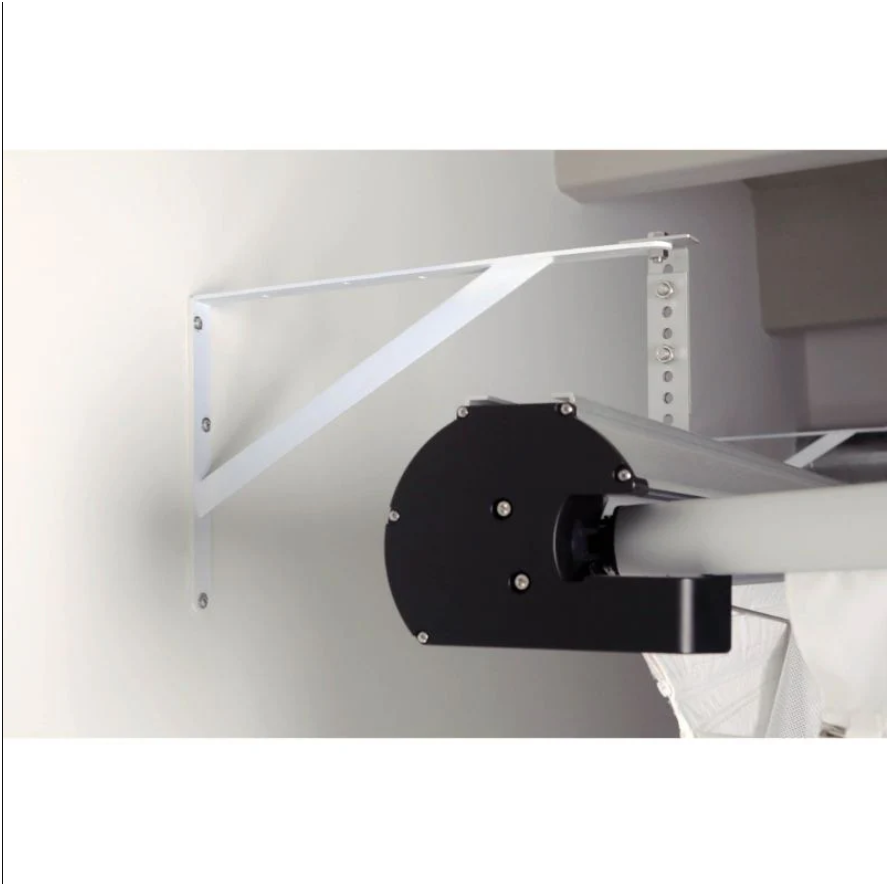
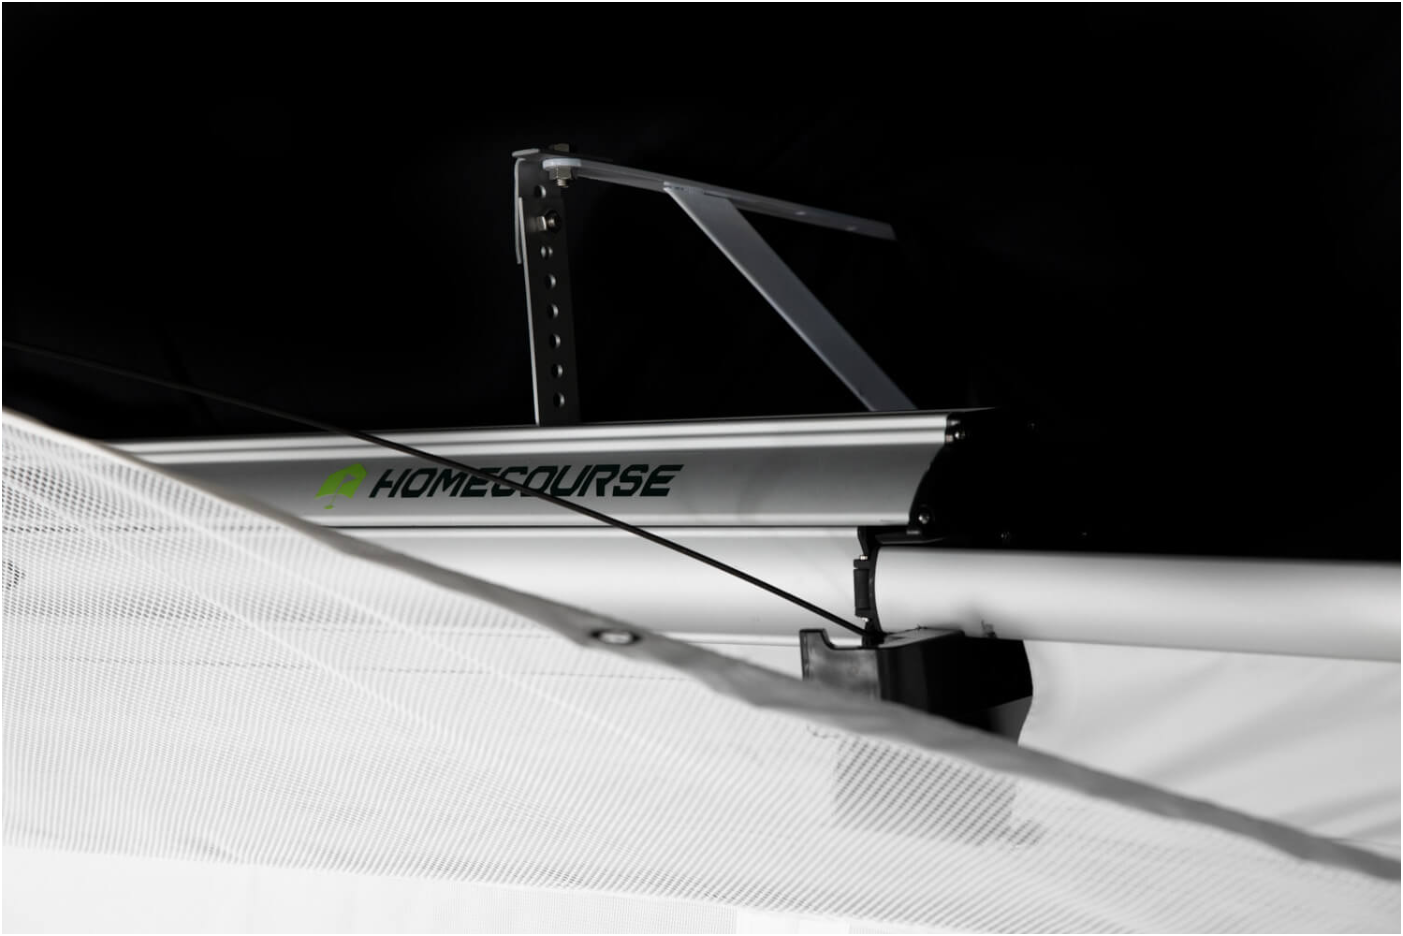
The HomeCourse Wall Mount Kit turns an open room into a focused, projector-ready hitting bay. It anchors the HomeCourse ProScreen to a wall, adds blackout curtains for containment and immersion, and gives you an impact-rated projection surface all in one kit. The goal is a fixed, tidy bay you can use every day, no temporary nets, no furniture shuffle.
You’ll notice the difference the first time you set it up. Mount the frame, tension the curtain/screen, dial in your projector, and you have a clean background for launch data and crisp visuals. It’s built to stand steady during full swings and keep errant shots from rebounding into the room.
What Sets the HomeCourse Apart
First, it’s a wall-anchored solution designed around a heavy-duty, retractable ProScreen that doubles as a projection surface. That removes the need to jury-rig a screen over a net. Second, the blackout-style curtains improve immersion and help control light spill for sharper projected images. Third, it’s a modular kit meant for a homeowner installer, hardware, adaptors, and clear instructions arrive ready to use.
How It Fits Inside a Modern Golf Simulator Setup
This kit is for fixed bays where you want a neat, permanent boundary and a bright screen surface for projectors and launch monitor overlays. It works well in garages, basements, or spare rooms, especially where ceiling rails aren’t possible, or you prefer a wall-anchored frame. Typical setups look like this:
- Small home bay: Wall-mounted screen, projector on a shelf, launch monitor/tablet to the side.
- Garage install: Curtains close to reduce daylight; projector and cabling tucked behind the frame for a tidy look.
- Lesson studio: Stable anchor points and a flat screen make video capture and data overlays more reliable.
If you need help mapping this to a tight space, give the room dimensions, and the assistant can sketch a layout.
How It Stacks Up in Today’s Enclosure Market
Enclosure kits range from budget DIY frames to premium, studio-grade systems. The HomeCourse sits in the practical, mid-to-premium side because it pairs a purpose-built ProScreen with a wall kit that’s meant to feel finished, not improvised. Competitors offer different trade-offs:
- Net Return + Simulator Kit: A popular path is to upgrade a Net Return net into a simulator bay by adding an impact screen and valence; it’s a simple retrofit if you already own their net.
- Carl’s Place / DIY kits: Budget-friendly DIY kits let you build a frame and screen cheaply, with more custom sizing options but often more hands-on assembly.
- Brand enclosures (SkyTrak, ACE, etc.): Some brands bundle frames, stretch screens, and valences into turnkey enclosures aimed at studios and serious sim owners; these emphasize durability and fit-for-purpose design.
HomeCourse’s wall kit trades some custom tinkering for a finished look and a screen designed for projection and impact. If you want a fast, tidy, wall-anchored result, it’s a clear choice. If you want the absolute cheapest frame or a fully custom size, DIY options may win.
Who This Kit Is Made For
This one’s for you if any of these fit:
- You want a permanent, wall-anchored hitting bay rather than a ceiling rail or freestanding net.
- You use a projector and need a flat, bright screen for better graphics and overlays.
- You want something that looks finished in a garage, basement, or spare room and handles full swings.
On the other hand, if you need a fully custom-width enclosure or you already own a Net Return net and want a low-cost simulator upgrade, alternative kits and retrofit options may be better fits.
Quick Price & Value Reality Check
The HomeCourse retractable enclosure family is listed in the mid-to-high hundreds up to around $1,999 for the ProScreen packages on retail sites, while enclosure packages from other vendors range widely depending on frame materials and included screens. That puts HomeCourse in the practical-but-premium bracket for people who want projection-ready performance and a finished look without contracting a custom build. Compare budgets and what’s included before you buy.
Practical Setup Tips (a few, useful bullets)
- Measure first: Confirm ceiling height, room depth, and swing clearance before you buy.
- Find studs or appropriate masonry anchors: The wall brackets are made for stud mounting; use the right anchors in block or brick.
- Projector alignment: Aim the projector slightly off-center to avoid tee-side shadowing and get crisp data overlays.
- Cable routing: Tuck cables behind the frame for a studio finish.
- Future-proofing: Leave room for turf, side netting, or a raised mat when planning your footprint.
Product Details
- Wall-mounted frame for a stable, fixed install.
- Impact-resistant curtains designed to absorb full-power swings and soften noise.
- Heavy-duty hitting screen that doubles as a projection surface.
- Complete mounting hardware kit for straightforward DIY assembly.
- Shop-ready, finished look made for garages, basements, or spare rooms.
Product Features
- Creates a contained, professional-looking bay for safe practice.
- Dual-purpose screen supports bright projected visuals and ball impact.
- Curtains add immersion and help manage ambient light for better projection.
- All-in-one kit reduces guesswork and extra sourcing.
- Modular layout allows add-ons like side nets, turf, or hitting mats.
If you want a neat, wall-anchored simulator bay that reads like a small studio and supports projector-based sims, the HomeCourse Wall Mount Kit is a practical, ready-to-install route. It’s less about bargain building and more about getting a finished, reliable bay you’ll use regularly.